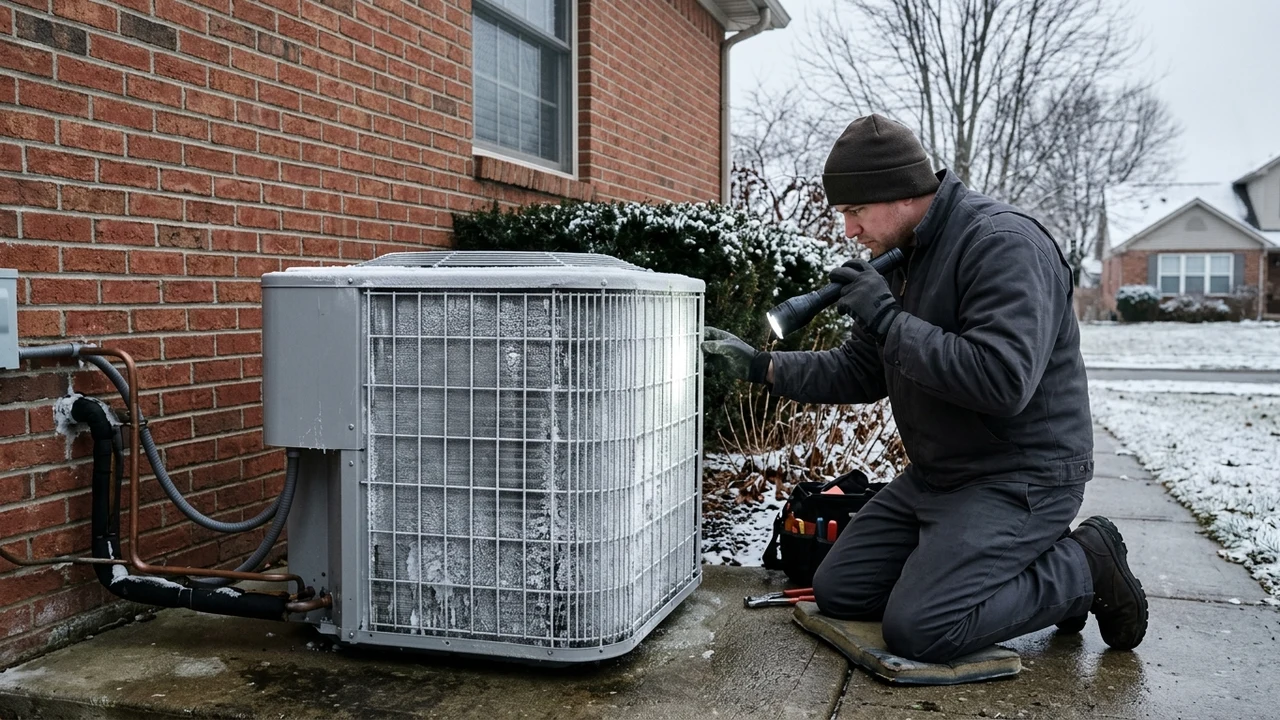
You step outside on a cold Richmond morning. Your heat pump is wrapped in ice. The outdoor coil looks like a frozen brick, the fan is barely spinning, and your house feels colder than it should. Then you think about your last power bill, and your stomach drops. Is this ice normal, or is your system trying to tell you something is broken?
Here is the short answer. A little frost is fine. A thick sheet of ice is not. Frost starts to form on the coil once its surface drops to about 32°F (0°C), and your heat pump is built to melt that frost on its own. When the ice keeps coming back and stays for hours, the trouble often points to two small parts: the defrost board and the ambient sensor. In this guide, I will show you what that ice really means, in plain words. I am with Richmond Air, and I have thawed a lot of frozen units across Virginia over the years.
Why Ice Forms on Your Outdoor Heat Pump Coils
In winter your heat pump runs in heating mode. That flips the job of the outdoor unit. The outdoor coil now works like a sponge that soaks up heat from the cold air outside. To pull heat in, the coil must get colder than the air around it. So the coil surface can drop well below freezing, sometimes down near 20°F on a raw, damp day.
Cold air still holds some water. When that damp air touches the icy coil, the water sticks and freezes. That white layer is frost. This is normal physics, not a defect. The cold coil plus the wet air makes frost build up slowly over time. On a foggy or drizzly Richmond day, frost grows faster because the air is loaded with moisture.
A thin coat of frost is not a big deal by itself. The problem starts when that frost turns into thick ice and never melts. Ice blocks airflow across the coil. Blocked airflow means the coil cannot grab heat, so your system works harder and your comfort drops. Water also expands about 9% when it freezes, and that pressure can bend fins and stress the metal over time.
So a healthy heat pump does two jobs at once. It makes a little frost, then it melts that frost away on a schedule. That melting step is called the defrost cycle. If you want to see what a fully iced unit looks like up close, this page on a frozen HVAC unit in Richmond breaks down the basics. When the melt step fails, ice wins. And that is usually a sign of a faulty part, not just bad weather.
Normal Frost vs. a Real Ice Problem
I have handled cases exactly like this many times, and the first thing I check is whether the ice is “light and moving” or “thick and stuck.” That one glance tells me a lot. Frost that comes and goes with the defrost cycle is healthy. A solid block that swallows the whole unit is a red flag.
Here is the simple rule I give homeowners. Your heat pump should clear its own frost several times a day. A normal defrost cycle runs about 5 to 15 minutes, then the unit goes back to heating your home. In cold, damp weather it may defrost roughly every 30 to 90 minutes. You might see steam rising off the unit during a melt. That steam is a good sign, not a fire.
A real problem looks different. The ice covers the top, the fan blades, and the sides. It lasts for hours, or all day. Sometimes you see ice on just one spot, which points to a leak or a charge fault. The table below shows how I tell the two apart at a glance.
| What You See | Likely Normal | Likely a Problem |
|---|---|---|
| Light white frost on the coil | Yes | No |
| Ice clears within 15 minutes | Yes | No |
| Steam during a short melt cycle | Yes | No |
| Solid ice on the fan and top panel | No | Yes |
| Ice lasting more than a few hours | No | Yes |
| Coil re-freezes right after defrost | No | Yes |
If your ice looks like the right-hand column, do not wait for it to fix itself. It will not. That pattern almost always means a defrost control fault, a sensor fault, or a refrigerant issue. Any of those needs a real look from a professional, and the sooner the better for your compressor.
What the Defrost Board Really Does
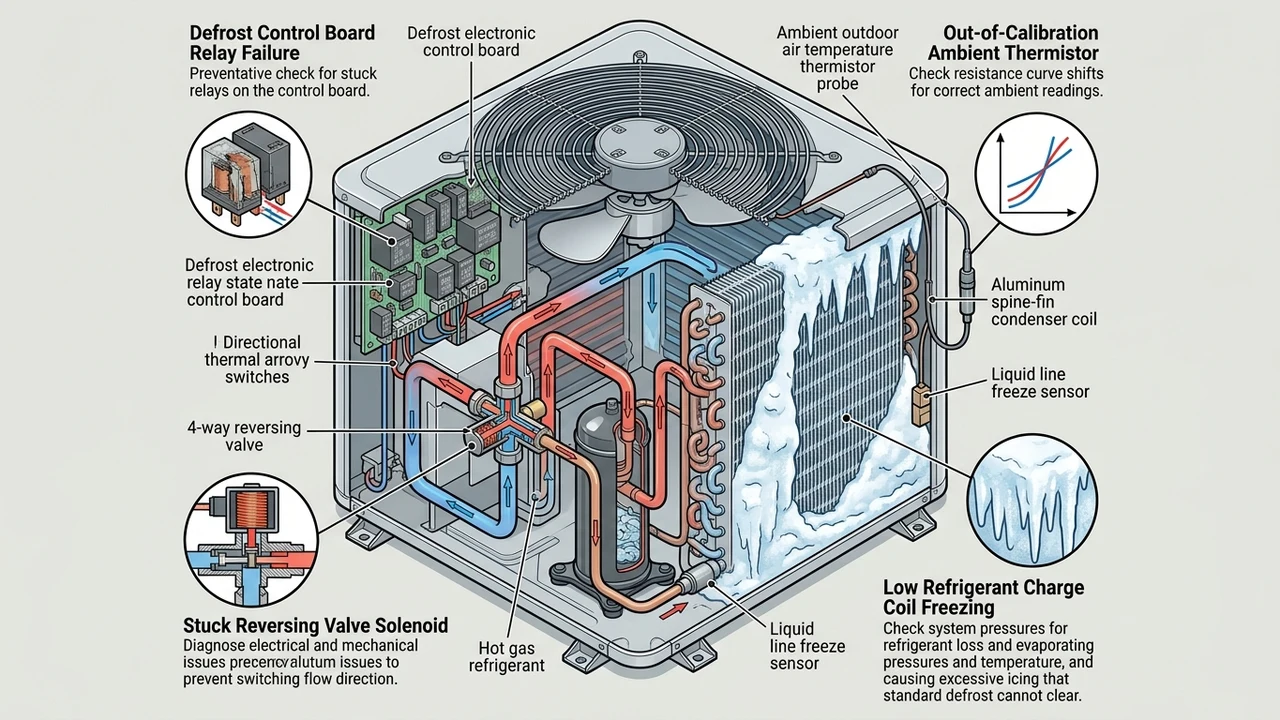
The defrost board is the small brain that runs the melt cycle. It is a circuit board inside your outdoor unit. Its job is simple to say but tricky to do well. It watches the clock and the coil, decides when frost has built up, and then starts the defrost cycle at the right time.
When it starts a defrost, a few things happen fast. The board flips the reversing valve, so hot gas flows out to the outdoor coil. It shuts off the outdoor fan so cold air will not fight the melt. It may switch on backup electric heat inside so your home does not blow cold air. All of that runs on a timer and on temperature readings.
A healthy board ends the defrost as soon as the coil is warm and clear. That keeps the melt short, usually under 15 minutes, which saves energy. A failing board gets this wrong in one of two ways. It either never starts a defrost, so ice piles up. Or it gets stuck in defrost, so the unit blows cool air and your bills climb.
Think of the board like a referee. When the ref falls asleep, nobody blows the whistle, and the game turns into a mess. A dead or faulty board means no whistle for the melt cycle. That is why a bad board is one of the first parts a tech checks when a heat pump ices over and stays that way for hours.
The Ambient Sensor – Your Heat Pump’s Weather Eye
In my professional experience, a bad sensor fools the whole system into making the wrong choice, and it hides in plain sight. The board is only as smart as the readings it gets. Feed it a wrong number, and even a perfect board will act dumb.
The ambient sensor measures the outdoor air temperature. A second sensor, the coil sensor, measures how cold the coil is. The defrost board reads both. It uses them to guess when frost is forming and when the coil is clear. Modern units use this “demand defrost” method, which is smarter than an old fixed timer.
Now picture a sensor that reads 10°F warmer than the real air. The board thinks it is mild outside, so it skips defrost cycles it should run. Ice builds. Or a sensor reads too cold, so the board runs defrost far too often, wasting power and short-cycling the compressor. Either way, a cheap part causes a big problem.
These sensors drift over the years. Wires corrode. Clips come loose. A sensor that is off by even a few degrees can throw off the whole melt schedule. When I test one and see it reading wrong, swapping it is usually a quick fix. A good sensor and a good board work as a team, and they both need to be right for the system to run efficiently.
Warning Signs the Defrost Board or Sensor Is Failing
Some signs are easy to spot from your kitchen window. You do not need tools to notice them. If you catch these early, you can save the compressor and skip a bigger repair. Here are the clues I tell every Richmond homeowner to watch for.
- Thick ice that stays on the coil, fan, or top panel for hours.
- The heat pump blowing cool air while set to heat.
- Power bills that jump for no clear reason.
- The unit short cycling, turning on and off every few minutes.
- Loud banging or a hissing sound when the cycle changes.
- The outdoor fan not spinning during normal heating.
- Ice that returns fast, right after a melt.
Any one of these can point to a faulty defrost board or a bad ambient sensor. Two or more together make it very likely. In my visits, roughly 8 out of 10 “iced solid” heat pumps trace back to a control fault, a sensor fault, or low refrigerant, not just the weather.
Some of these signs overlap with other faults, and that is the tricky part. A fan that will not spin might be a motor, not the board. Warm air one minute and cold the next can be a stuck reversing valve. This is where guessing gets expensive. If your unit shows these clues, our heat pump repair service in Richmond can test the board and sensors and tell you exactly what is wrong.
Do not ignore a short-cycling heat pump. Each hard start stresses the compressor, which is the most costly part in the whole system. Catching a failing board early can save you from a much larger bill down the road. The longer the ice sits, the more strain it puts on every part inside.
What Ice Buildup Signals to a Technician
I have seen this pattern many times in my work: the shape and spot of the ice is a map, and it points straight to the failing part. Before I touch a single wire, the ice already tells me a story. A tech reads that story to save time and to find the true cause.
Even icing across the whole coil usually means a defrost cycle that is not running. That points to the board, the sensor, or the reversing valve. Ice on just the bottom often means a drain or base-pan problem, where melt water pools and re-freezes. Ice mostly on one side or on the copper lines can signal a refrigerant leak or a low charge.
The table below is close to the mental checklist I run in the field. It links what you see to what is likely wrong. This is not a promise, but it is a strong first read that helps me diagnose faster.
| What the Ice Looks Like | What It Often Signals |
|---|---|
| Whole coil iced, no melt cycle | Faulty defrost board or ambient sensor |
| Ice returns minutes after defrost | Sensor reading the wrong temperature |
| Ice on lines and one coil section | Low refrigerant or a leak |
| Ice only near the base | Blocked drain, pooling water |
| Ice plus a fan that will not spin | Fan motor or fan relay on the board |
Reading ice this way cuts down on trial and error. It also protects your wallet, because I test the cheap parts first, like the sensor, before touching pricey components. A quick, correct read here can save hours of labor and keep the whole repair small.
Other Causes of Ice (It’s Not Always the Board)
The board and sensor get a lot of blame, and often they earn it. But not always. Ice is a symptom, and several faults can trigger it. A good tech rules out each one instead of swapping parts and hoping. Let me walk through the usual suspects.
Low refrigerant is a big one. When the charge drops from a leak, the coil runs colder than it should and frosts over fast. You may also see ice creeping onto the copper lines. If you spot oily marks or hear a faint hiss, look at the signs of a refrigerant leak in Richmond homes. A leak will not fix itself, and topping off without repair just wastes money.
Airflow trouble is another. A dirty coil, crushed fins, or leaves packed against the unit choke the airflow. Less air across the coil means colder metal and more ice. A weak or dead outdoor fan does the same thing, since the fan pulls air through the fins. Our page on coil problems in Richmond covers how buildup on the coil hurts the whole system.
Water is a sneaky cause too. If your gutter drips onto the unit, that water freezes on the coil at night. A clogged base-pan drain lets melt water pool and re-freeze into a solid block. I have found units sitting in a bowl of ice simply because the pad sank and held water. These fixes are cheap, but only if you find them early.
Here is my honest take. Most guides say “it is the defrost board” and stop there. From what I have seen, the real answer is a mix, and roughly 1 in 4 iced units I visit has a refrigerant or drainage cause instead. That is why a full check beats a quick guess. Skipping the check just leads to repeat visits and wasted cash.
Heat Pumps and Richmond Winters
I have worked on Richmond systems for years, and our winters play a special trick on heat pumps that folks in colder states rarely see. Our cold is wet, not dry. That mix of near-freezing air and heavy moisture is the perfect recipe for coil ice.
Richmond does not get brutal cold most days. Our average January low sits around 29°F, and daytime highs often reach the 40s°F. That sounds mild. But that range is exactly the danger zone for frost. When the air hovers near 32°F and stays damp, the coil frosts up again and again, so your defrost cycle runs more often than it would in bone-dry cold.
Freezing rain and drizzle make it worse. A wet coil at night, then a hard freeze by morning, can lock a heat pump in ice. Add an aging sensor or a tired board, and the melt cycle cannot keep up. This is why I get so many “my unit is a block of ice” calls after a damp Richmond cold snap.
The U.S. Department of Energy points out that heat pumps move heat instead of making it by burning fuel, which is why they can deliver up to about three times more heating energy than the electricity they draw. You can read the plain-English basics on the Department of Energy’s heat pump page. That efficiency only holds when the coil stays clear, so in our damp climate a healthy defrost system matters even more.
Safe Steps You Can Try Before Calling a Pro
Before you call anyone, there are a few safe checks you can do yourself. None of these need tools or skill. They take about 10 minutes and can save you a service visit if the fix is simple. Just go slow and stay safe.
- Switch the system to “emergency heat” or off for a bit. This stops it from fighting the ice and can protect the compressor.
- Gently melt the ice with lukewarm (not boiling) water poured over the coil. Never use a hammer, ice pick, or knife.
- Clear away leaves, snow, and junk from around the unit so air can move freely.
- Check your gutters and downspouts to make sure water is not dripping onto the top of the unit.
- Look at your indoor air filter. A dirty filter chokes airflow and can lead to freezing.
- Note the pattern. Write down when the ice forms and how long it lasts.
Here is my warning, and I mean it. Never chip at the ice with a sharp tool. You can slice a coil or a copper line in a second, and a small leak turns a cheap fix into a costly one. Water expands about 9% as it freezes, so the ice is already stressing your fins without you adding real damage on top of it.
If the ice melts and does not return, you may have solved it. Maybe a filter or a gutter drip was the cause. If the ice comes right back within an hour, the fault is deeper, likely the board, the sensor, or the refrigerant charge. At that point, stop and let a tech take over so you do not risk the compressor.
When to Call a Professional
I have handled cases exactly like this before, and the ones that get expensive are always the ones people wait too long on. Ice on a heat pump is not a “wait and see” issue. Every extra day of solid ice adds strain to parts that cost real money to replace.
Call a pro when the ice returns within an hour of melting. Call when the unit blows cool air on heat, or when it short cycles. Call when your power bills jump with no change in your habits. And call right away if you hear loud banging, smell burning, or the breaker keeps tripping. Those signal an electrical or compressor risk, and that can turn into an emergency fast.
A tech brings tools you do not have at home. We measure refrigerant levels, test the defrost board’s signals, and check each sensor with a meter. We can see if the reversing valve is stuck. This kind of testing is how we find the true fault quickly, instead of guessing and swapping parts one by one.
If you are stuck with a frozen unit that will not behave, let us take a look together. Our team can run a full test and tell you exactly what is failing, whether it is a board, a sensor, or something else. A heat pump that keeps freezing needs attention before the cold does real damage to the compressor, and quick action keeps the repair small.
How We Diagnose Defrost and Sensor Faults
People often ask what really happens during a service call. It is not magic. It is a clear, step-by-step test that rules out each cause in order. Knowing the steps helps you trust the bill, because you can see the work behind it.
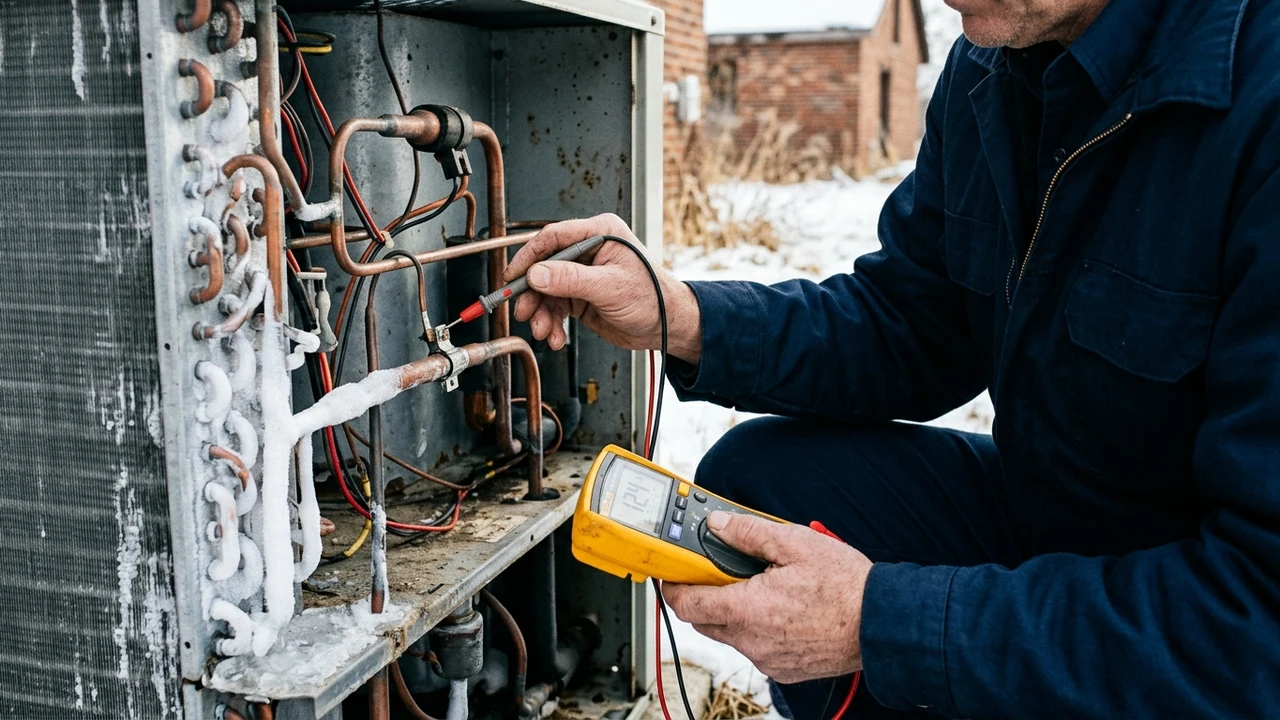
First we look and listen. The ice pattern, the sounds, and the air temperature give us a fast first read. Then we force a defrost cycle to watch the board in action. We check if it flips the reversing valve, stops the fan, and warms the coil. A board that will not do these steps is the problem.
Next we test the sensors with a meter. We compare what the ambient sensor reports against the real outdoor temperature. If the reading is off by more than a couple of degrees, we replace it. We also read the coil sensor. These small tests catch faults that a blind “parts swap” would miss every time.
Then we check the refrigerant and the airflow. Low charge or a dirty coil can copy a board fault, so we confirm before we blame any part. This full method takes more time up front, but it means we fix the right thing once. In my experience, a careful diagnosis step cuts repeat visits by more than half, which saves you money and hassle.
Repair or Replace the Board?
In my professional experience, the “repair or replace” question is less about the part and more about the age of the whole unit. A single sensor or board is usually worth fixing. A dying system around it may not be.
A defrost board or an ambient sensor is a small part. Swapping one is a same-day job in most cases, and it brings the unit back to normal operation. If your heat pump is under about 10 years old and the rest of the system is healthy, fixing the board or sensor is almost always the smart call.
The math changes on older units. If the heat pump is 12 to 15 years old, has a refrigerant leak, and now needs a board too, those repairs stack up fast. At some point new equipment saves more on bills than the old one is worth. The table below shows the factors I weigh with homeowners.
| Factor | Lean Toward Repair | Lean Toward Replace |
|---|---|---|
| System age | Under 10 years | Over 12 years |
| Fault type | One board or sensor | Board plus compressor or big leak |
| Repair history | First real fix | Repeated repairs each winter |
| Energy bills | Steady | Climbing every year |
| Refrigerant type | Current | Old and hard to find |
There is no single right answer for everyone. The best move is an honest test and a clear quote, so you can choose with open eyes. If you would like help weighing it, we can inspect the unit and lay out both paths without any pressure. I would rather fix a sensor than sell you a system you do not need.
How to Prevent Ice Problems Next Winter
The best repair is the one you never need. A little care each year keeps the defrost system healthy and the ice light. I have watched simple maintenance stop the exact faults that cause winter breakdowns. Here is what actually helps.
- Book a fall tune-up before the first freeze so the board and sensors get tested early.
- Keep the unit clear of leaves, grass, and snow, with at least a couple of feet of open space.
- Fix gutter drips so water cannot fall on the coil and freeze overnight.
- Change your filter every 1 to 3 months to protect airflow.
- Watch the first cold snap and note how the unit defrosts.
- Call early if you see thick ice, not after weeks of it.
A yearly check is the single biggest win. ENERGY STAR notes that a heat pump only stays efficient when it is the right size and kept in good shape, so a quick seasonal test protects both your comfort and your bills. You can see their homeowner tips on the ENERGY STAR heat pump page.
Our seasonal tune-up service covers the board test, sensor check, and airflow check in one visit. You can also follow our Richmond maintenance checklist to stay on track between visits. A tuned heat pump runs more efficiently, ices up less, and lasts longer. Small steps now beat a cold house and a big bill later.
The Bottom Line
Ice on your outdoor heat pump is a message, not just bad luck. A little frost that melts on its own is normal. A thick block that lasts for hours is your system asking for help. Most of the time, that message points to a faulty defrost board or a drifting ambient sensor, though a refrigerant leak or an airflow issue can be the real cause too.
In our damp Richmond winters, a healthy melt cycle matters even more. When the air sits near 32°F and stays wet, the coil frosts again and again, and only a working board and sensor can keep up with it. Watch for the warning signs, try the safe checks, and please do not chip at the ice with anything sharp.
If the ice keeps coming back, do not let it grind down your compressor over the season. Richmond Air can test the board, the sensors, and the charge, then fix the true fault fast. Stay warm out there, and I would love to hear what you find when you check your own unit this winter.
Frequently Asked Questions
Is it normal for my heat pump to have ice on it in winter?
Yes, a little frost is normal. In heating mode the outdoor coil gets very cold, so damp air freezes on it. Your heat pump should melt that frost on its own during a short defrost cycle, usually within 5 to 15 minutes. The worry starts only when the ice grows thick, covers the fan and top panel, and stays for hours at a time.
Why is my heat pump covered in a solid block of ice?
A solid block means the melt cycle is not working. The most common causes are a faulty defrost board, a bad ambient sensor, or low refrigerant from a leak. Blocked airflow and a clogged base drain can do it too. In my visits, roughly 8 out of 10 “iced solid” units trace back to one of these faults, so it is worth a real test instead of a guess.
How long should a defrost cycle last?
A normal defrost is short. Most run about 5 to 15 minutes, then the unit goes back to heating your home. In cold, wet weather your heat pump may defrost every 30 to 90 minutes. If a cycle runs much longer than that, or never seems to end, the board or a sensor is likely giving bad signals and needs a professional look.
Can I pour hot water on the ice to melt it?
Use lukewarm water, not boiling. Boiling water can crack cold metal or plastic parts. Pour it gently over the coil to melt the ice, and never use a hammer, knife, or ice pick. A sharp tool can puncture the coil and cause a refrigerant leak in one second, which turns a small job into a big one. Water also expands about 9% as it freezes, so the ice is already stressing the fins.
How much does it cost to fix a defrost board or sensor?
The price depends on your unit’s brand, the exact part, and the labor, so I will not throw out a fake number. A sensor is often a small, quick fix, while a full defrost board costs more. The honest way to know is a quick test and a clear quote. If you would like a straight answer for your own system, we can inspect it and show you the real cost before any work starts.