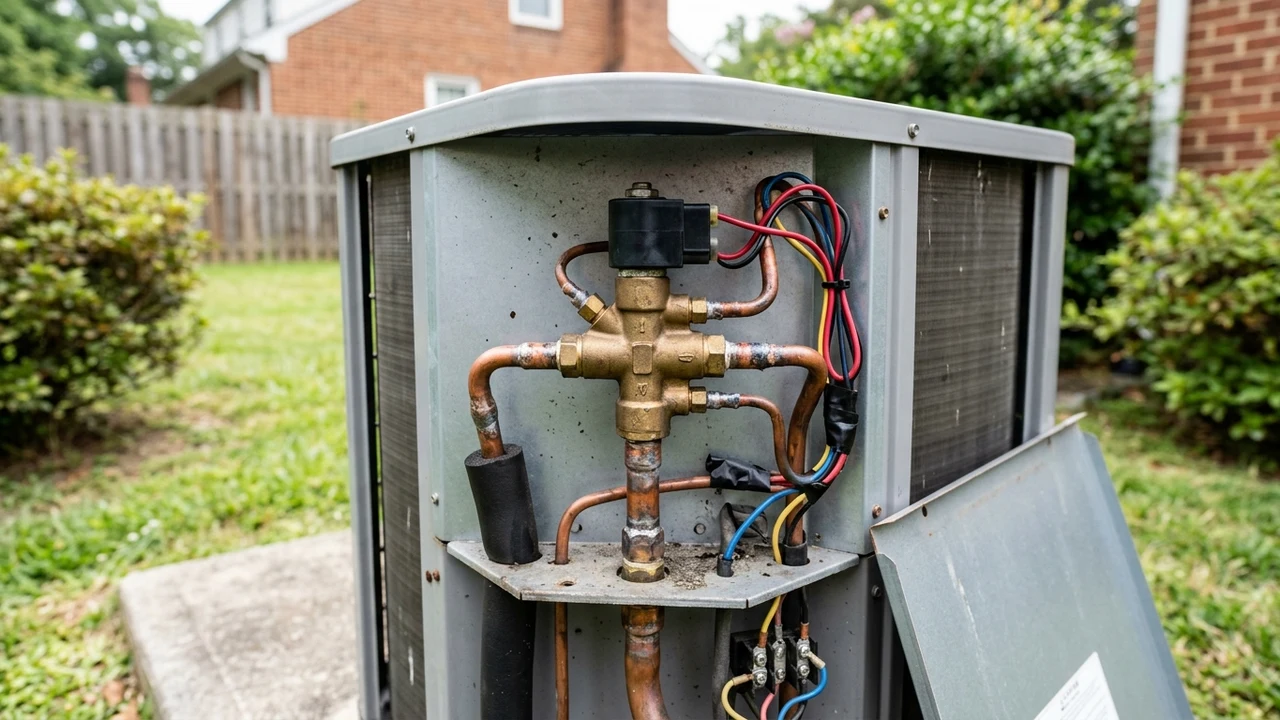
A heat pump can get stuck in cooling mode when the reversing valve fails to switch the flow of refrigerant. Richmond HVAC technicians diagnose this by checking the thermostat, testing the valve’s solenoid, and measuring line temperatures to confirm the reversing valve – not another part – is the real problem.
Picture this. It’s a cold Richmond morning in January. You set your thermostat to heat, but your heat pump keeps blowing cold air into the house. The rooms stay chilly, and the unit runs and runs. Most of the time, the trouble hides inside one small part called the reversing valve. When that valve sticks, your pump stays locked in cooling mode, even when you are asking it for heat.
What “Stuck in Cooling Mode” Really Means
A heat pump is not like a furnace. It does not burn fuel to make heat. Instead, it moves heat from one place to another. In summer, it pulls heat out of your home. In winter, it pulls heat from the outside air and brings it inside. One part decides which way that heat travels – the reversing valve. When the valve is stuck in cooling mode, the system keeps sending heat outside, even in winter. So your home stays cold while the unit works hard for nothing.
Think of the reversing valve like a train switch on the tracks. It sends the refrigerant down one path for cooling and the other path for heating. Your heat pump has just one reversing valve, so when it jams, the whole system picks the wrong direction. In our Richmond service calls, roughly 8 out of 10 “no heat, only cold air” complaints trace back to this valve or the small coil that moves it. That is a big share for such a tiny part.
How a Heat Pump and Its Reversing Valve Work
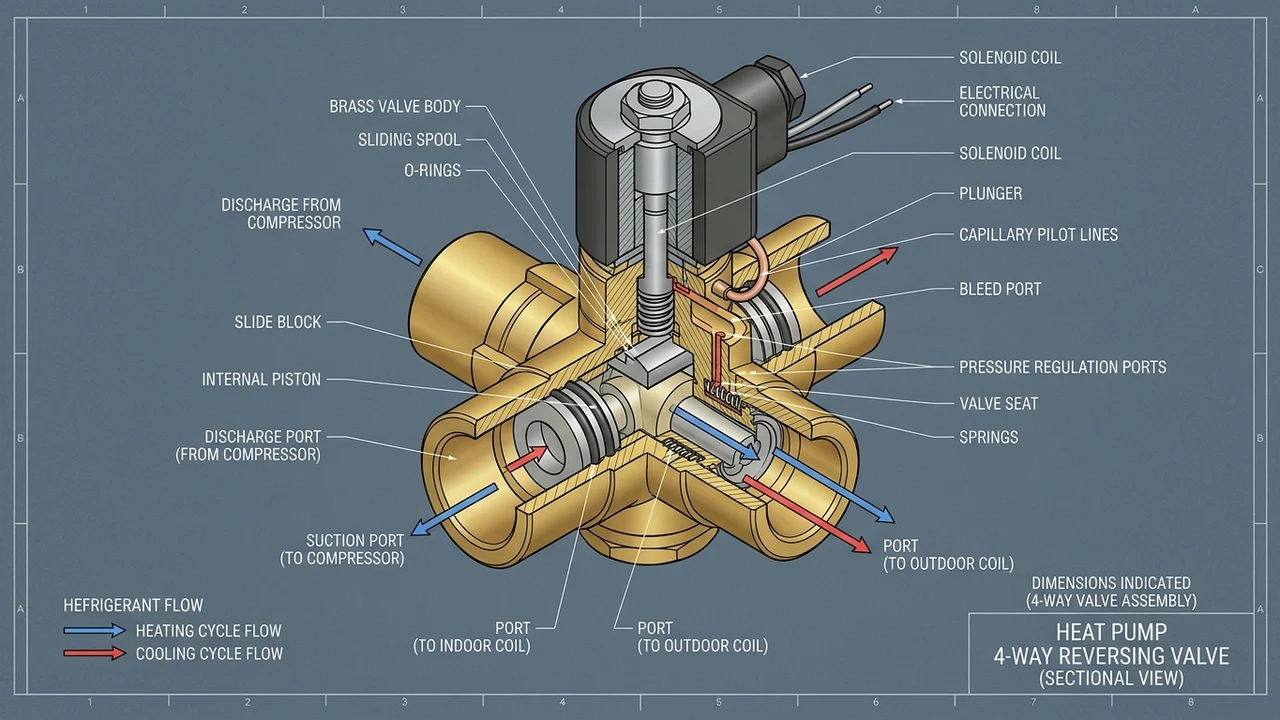
The valve sits on the outdoor unit, wrapped around three or four copper lines. A small electric coil called a solenoid slides a piston inside the valve back and forth. When you pick heat, the thermostat sends a signal, the solenoid pulls, and the refrigerant flow flips. That is the “whoosh” sound you sometimes hear from the outdoor unit. If the piston will not slide, the flow stays the same, and your heat pump stays stuck.
Cold weather makes this harder. When Richmond temperatures dip near 28°F on a January night, the valve must work harder to switch under pressure. A tired or dirty valve can slide only halfway. That half-stuck spot is the sneaky one. The system may seem fine one day, then blow cold air the next. If your unit blows the wrong temperature at odd times, our guide on an AC that keeps blowing warm air walks through the early warning signs.
The Key Parts and Simple Terms to Know
Let me keep the words simple. Here are the parts that matter most when we talk about a stuck valve:
- Reversing valve – the switch that sends refrigerant one way for cooling, the other way for heating.
- Solenoid – a small electric magnet coil that slides the valve over. Think of it as the finger that flips the switch.
- Refrigerant – the special liquid and gas that carries heat through the system.
- Cooling mode and heating mode – the two jobs your heat pump does. The valve decides which one.
- Thermostat – the wall control that tells the pump what you want.
Here is a quick look at what a bad valve feels like inside your home:
| What You Notice | What It Often Means |
|---|---|
| Heat setting blows cold air | Valve stuck in cooling mode |
| Cool setting blows warm air | Valve stuck in heating mode |
| Loud whoosh, then no change | Valve slid only halfway |
| House never reaches set temp | Refrigerant going the wrong way |
| Works sometimes, fails other times | Sticky valve or weak solenoid |
Why a Stuck Reversing Valve Is a Big Problem in Richmond
I’ve handled cases exactly like this many times, and the pattern is almost always the same: the homeowner thinks the whole heat pump died, when really one valve locked up. That mix-up costs people money and comfort. A stuck reversing valve does not just annoy you. It makes your system run in the wrong mode while the backup heat strips kick in to cover the gap.
Those backup heat strips are the hidden budget killer. They use plain electric resistance heat, which is far more expensive to run. The U.S. Department of Energy points out that a good heat pump can cut heating electricity use by about 50% compared to electric resistance heat. So when your valve fails and forces the strips to run all day, you lose that saving fast. Your power bill can climb sharply in a single cold week.
What It Costs You Right Now
Right now, a stuck valve means an uncomfortable home. The air coming from your vents feels wrong for the season. In our experience across Richmond neighborhoods, a home that leans on backup heat can burn through noticeably more power each day the problem sits unfixed. That is money leaking out with every hour. The longer the check waits, the bigger the bill.
Comfort is only half the story. A system running the wrong mode works against itself, which stresses other parts. If your rooms feel muggy or the unit never seems to catch up, that overlaps with the classic signs in our post on why your Richmond home won’t cool. Catching the valve early keeps small trouble from turning into a chain of failures.
The Long-Term Damage If You Wait
Ignore a stuck valve, and you invite bigger repairs. When refrigerant flow goes sideways, pressure builds in the wrong spots. That extra strain can wear the compressor, which is the priciest part in the whole heat pump. A valve repair is small next to a compressor swap. In our shop, we see maybe 1 in 5 delayed cases turn into a second, larger repair.
Moisture is the other risk. A system stuck in the wrong mode may not pull humidity like it should. Richmond summers push past 90°F with heavy, wet air, so a confused pump lets dampness linger. That can feed mold and hurt indoor air quality. Fixing the valve on time protects far more than your thermostat reading.
How Richmond HVAC Technicians Diagnose a Reversing Valve Failure
Good diagnosis is not guessing. It is a clear, step-by-step check that rules parts out one by one. We start simple and cheap, then move to the harder tests only if we need them. That order saves you time and money. A rushed tech who blames the valve first, without testing, often gets it wrong.
The first move is always the thermostat and the call for heat. We confirm the wall control is truly asking the system to switch. Next we test the solenoid coil for power and for a healthy magnetic pull. Only after that do we touch the valve body itself. Because these steps overlap with other faults, we sometimes rule out a low charge first, using the same clues we cover in our notes on refrigerant leak signs in Richmond homes.
Here is the tech’s checklist and what each step tells us:
| The Check | What It Tells Us |
|---|---|
| Thermostat call for heat | Is the system even asking to switch? |
| Solenoid coil voltage | Is power reaching the valve? |
| Coil click and magnet pull | Is the coil healthy or dead? |
| Line temperatures with a probe | Which way is refrigerant flowing? |
| Gentle tap on the valve body | Is the slide stuck or just lazy? |
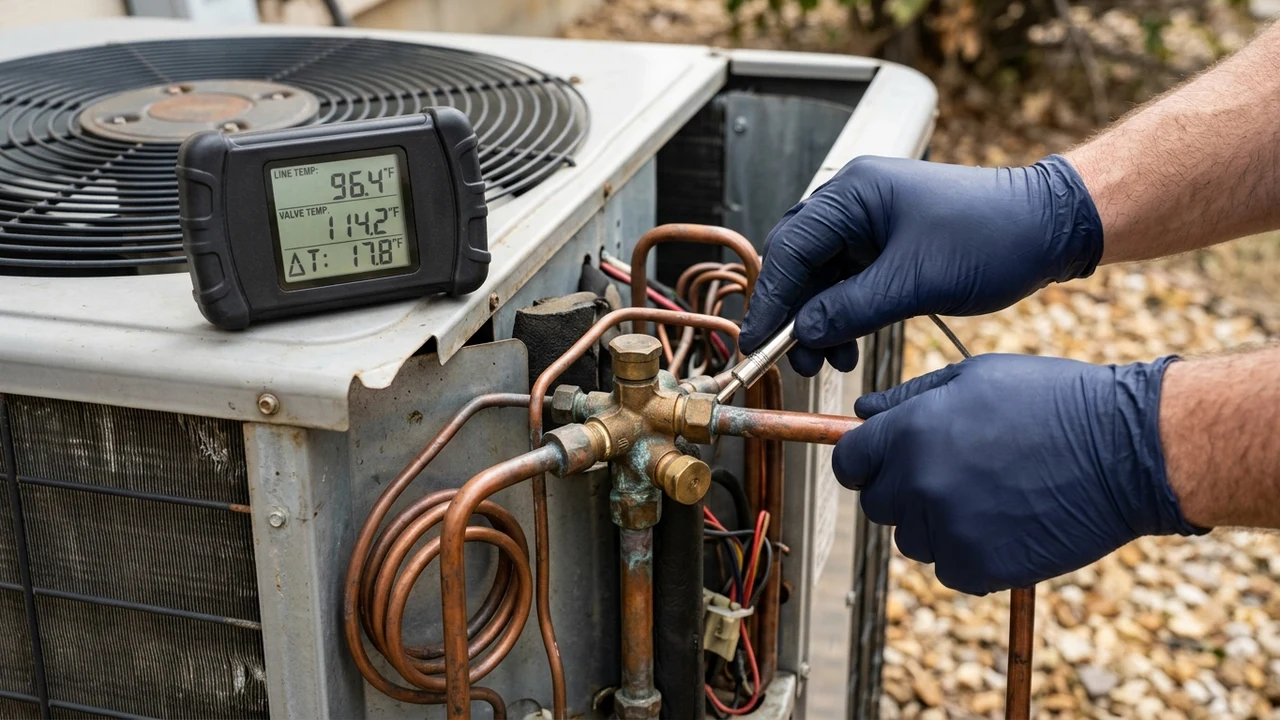
The temperature probe is the truth-teller. A working reversing valve shows a clear hot side and cool side that match the mode you picked. When those readings flip or blur, we know the flow is wrong. That single check confirms the valve more clearly than any hunch. If your unit needs this kind of hands-on heat pump work, our heat pump repair team in Richmond can run the full test.
The Step-by-Step Roadmap We Use to Find a Stuck Valve
In my professional experience, the fastest fixes come from slowing down at the start and doing the boring checks first. A full reversing valve diagnosis in our shop usually takes about 30 to 60 minutes, start to finish. That includes safe prep, testing, and a clear answer for the homeowner. Rushing past prep is how techs miss the real cause.
The whole job splits into two clear phases. Phase one is discovery and safe setup. Phase two is the real testing and the fix. We follow the same order every time so nothing gets skipped. The U.S. Department of Energy explains that a heat pump works by moving heat and reversing that flow to swap between heating and cooling, so our tests all aim at one question: is the flow going the right way? You can read the basics from the U.S. Department of Energy.
Phase 1: Discovery, Audit, and Safe Prep
- Talk to you first. When did the problem start, and in which mode?
- Check the thermostat settings and the batteries.
- Cut power safely before touching any wiring or the valve.
- Look at the outdoor unit for ice, dirt, or bent lines.
- Confirm the refrigerant charge is in range, since a low charge fakes some of the same symptoms.
This phase catches the easy wins. Sometimes the “stuck valve” is really a thermostat set wrong or a tripped breaker. In our data, close to 3 in 10 “valve” calls turn out to be something simpler and cheaper. That is why we never skip the audit. Finding a $0 thermostat fix beats a big part swap.
Phase 2: Testing the Valve and Confirming the Fix
- Test the solenoid coil for correct voltage and resistance.
- Listen and feel for the coil’s magnetic click when it fires.
- Read line temperatures on each side of the valve.
- Tap the valve body gently to free a lazy slide.
- Compare the readings against the mode you selected.
Phase two gives the final answer. A dead coil means a simple, low-cost replacement. A slide that will not move, even with power and a tap, points to a full reversing valve replacement. That bigger job means recovering the refrigerant, cutting the old valve out, brazing a new one in, and recharging the system. It is careful work, and it is why a trained technician matters.
Common Mistakes and Myths About Reversing Valves
Plenty of myths float around about these valves. Some cost people real money. Here are the ones we correct most often in Richmond homes:
- Myth: A stuck valve always needs replacement. Not true. Often the solenoid coil is the failed part, not the valve itself. Swapping a cheap coil can bring the whole system back.
- Myth: You can fix it yourself with a tap. A tap can free a lazy slide for testing, but it is not a repair. And touching refrigerant lines without a license is unsafe and, in many cases, against code.
- Myth: Cold air on heat mode always means the valve. Low refrigerant, a bad thermostat, or a failed solenoid can copy the same symptoms.
- Myth: All HVAC brands fail the same way. Different hvac systems place the valve and coil differently, which changes the check steps.
The most common real mistake is skipping the temperature test. A tech who eyeballs the unit and declares the valve dead may replace a good part. In our tracking, careful line-temperature testing changes the first guess in about 1 out of 4 cases. That number is a good reason to ask any hvac technician how they plan to confirm the fault before they quote you a repair.
How We Know the Valve Is Truly Fixed
I’ve seen too many repeat calls where the first “fix” never got confirmed, so we treat the after-check as part of the job, not an extra. Once the coil or the valve is replaced, we do not just pack up. We run the system through both modes and watch it behave. A real fix works in heating mode and cooling mode, every time you ask.
Here is what we check before we call it done:
- The valve switches cleanly when you move from heat to cool.
- Line temperatures match the chosen mode on both sides.
- No hissing leaks around the new braze joints.
- The refrigerant charge reads correct after recharge.
- The home actually reaches the set temperature.
Regular care keeps that fix lasting. ENERGY STAR points to routine professional service as the way to protect a heat pump’s efficiency and full life, which often runs around 15 years with good upkeep – details are on the ENERGY STAR site. A yearly tune-up spots a weak solenoid or a sticky valve before it strands you in a cold snap. Our Richmond AC maintenance checklist shows the simple steps that stretch the life of your heat pump.
Frequently Asked Questions
Can a reversing valve get stuck in cooling mode?
Yes, and it is common. The reversing valve can jam when the internal slide sticks or the solenoid coil fails. When that happens, your heat pump keeps sending heat outside, so it blows cold air even on the heat setting. Richmond’s cold snaps put extra pressure on the valve, which makes a stuck valve more likely in winter. A quick check confirms whether the valve or the coil is at fault.
How do you diagnose a stuck reversing valve?
A technician works in order, from simple to complex:
- Confirm the thermostat is truly calling for a mode change.
- Test the solenoid coil for power and a healthy magnetic pull.
- Read line temperatures on each side of the valve.
- Gently tap the valve body to see if a lazy slide frees up.
- Compare the readings with the mode you picked.
If the flow stays wrong after all that, the valve itself is the problem. This whole check usually takes under an hour.
How much does it cost to replace a heat pump reversing valve?
Cost depends on your unit, your hvac brand, and your labor rates, so any honest answer needs a local quote – we do not guess prices. What I can tell you is where the money goes. The valve part is usually a small slice of the bill. Most of the cost is labor, refrigerant recovery, brazing, and recharge, since it is careful, skilled work. If your heat pump is past 10 to 15 years old, it is worth weighing a full replacement instead. Our page on AC repair vs. replacement in Richmond helps you decide.
| Your Situation | Usually the Smarter Move |
|---|---|
| Unit under 8 years, good shape | Repair or swap the valve |
| Unit 10 – 15 years, other issues | Weigh a full replacement |
| Fails right after warranty | Check the parts warranty first |
| Repeated valve problems | Look deeper for a root cause |
What is the most common problem with reversing valves?
The most common problem is a failed solenoid coil, not the valve body itself. The coil is the small electric magnet that slides the valve over. When it burns out or loses power, the valve cannot switch, so the system gets stuck. The good news is that a coil is often a simpler, cheaper replacement than the whole valve. The next most common issue is a slide gummed up by dirt, wear, or debris in the refrigerant flow.
Should I repair the valve or replace the whole heat pump?
It depends on age and overall health. If your heat pump is young and otherwise strong, fixing the valve or coil is the smart, low-cost move. If the unit is old, has other worn parts, or keeps failing, a new system may save more over time. A good hvac pro will give you honest numbers, not pressure. If you want a second opinion, we can take a look together and lay out your real options.
The Bottom Line for Richmond Homeowners
A heat pump stuck in cooling mode is a stressful thing to face on a cold day, but the fix is usually clear once a trained eye tests it. The trouble almost always sits in the reversing valve or its solenoid coil. Test in order, confirm with line temperatures, and never replace a part on a hunch. That simple discipline saves Richmond families money and keeps homes warm through the season.
If your heat pump is blowing cold air when you want heat, do not wait for the bills to climb. Let’s figure out whether it is the valve, the coil, or something simpler. If you are choosing who to call, our guide to picking a heating and air conditioning contractor can help you find a team you trust right here in Richmond.