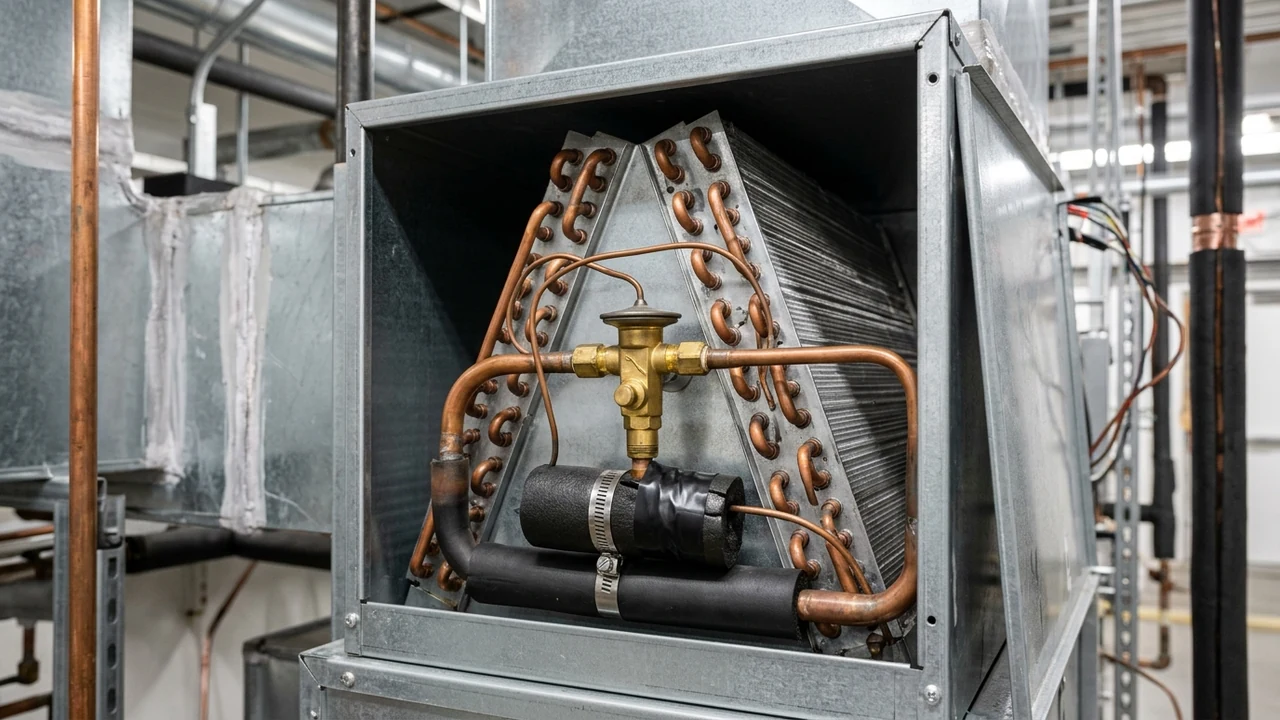
Mismatched evaporator and condenser coils happen when your indoor coil and outdoor unit aren’t built to work as one. This lowers efficiency, strains the compressor, and can void your warranty. To fix it, pair AHRI-certified parts, match the liquid line size in inches, and confirm the SEER2 rating before install.
Picture this. Your air conditioner is barely a year old. Yet your Richmond home still feels sticky and warm on a hot July afternoon. The unit runs and runs, the power bill keeps climbing, and nobody can tell you why. Often the machine itself is fine. The real trouble is two parts that were never designed to run together.
What a Mismatched Evaporator and Condenser Coil Setup Really Means
An air conditioner is really a team of two big parts. The outdoor condenser sits outside and pushes heat out of your home. The indoor evaporator coil sits inside, usually on top of your furnace or air handler, and pulls heat out of the air. These two parts share refrigerant through a set of copper lines. When they are built and tested to run together, you get a matched system. When they are not, you get a mismatch – and a long list of headaches.
The word “matched” is not marketing talk. Every modern system carries a tested rating. That rating only counts when the exact coil and condenser are paired the way the maker planned. Swap one part for a cheaper or older model, and the numbers on the sticker stop being true. Your real efficiency drops. Your comfort drops right along with it. This is the same slow damage you see when a dirty or failing evaporator coil is left alone too long.
A Mismatched HVAC System in Plain Words
A mismatched hvac system is easy to picture. It is any setup where the indoor coil and the outdoor unit were not designed, sized, or certified as a pair. Some mismatched hvac systems mix an old coil with a new condenser. Others pair the wrong size, the wrong refrigerant type, or the wrong efficiency class. On paper the parts look close enough. In real life, close is not the same as correct, and the system pays for that gap every single day.
The Outdoor Condenser Meets the Indoor Coil
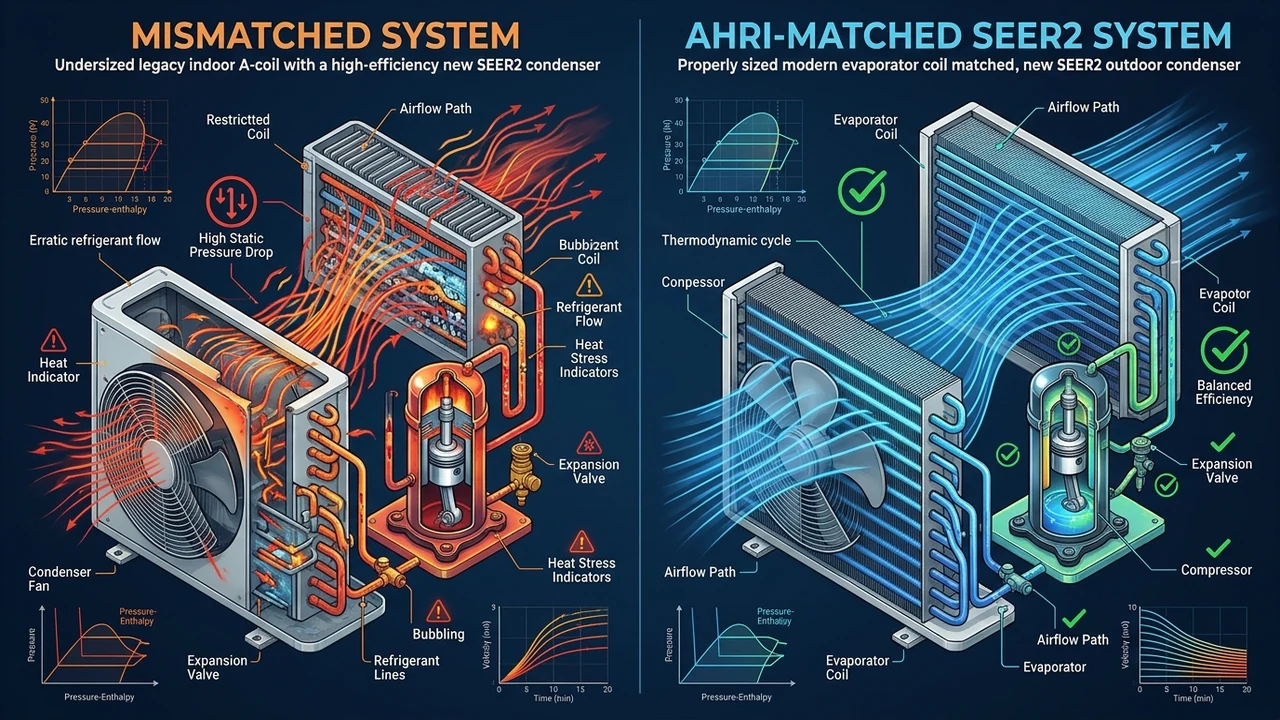
Think of the outdoor condenser and the indoor coil like a lock and a key. The key can look almost right and still refuse to turn. A 3-ton condenser wants a matching 3-ton coil, sized for the same airflow and the same pressures. When the pair is off, refrigerant flow gets messy, heat transfer suffers, and the whole system limps along. Here is how a matched setup stacks up against a mismatched one.
| Factor | Matched System | Mismatched System |
|---|---|---|
| SEER2 rating | Verified and accurate | Not valid; real efficiency drops |
| Compressor strain | Normal | High; early failure risk |
| Warranty | Fully honored | Often voided |
| Refrigerant flow | Balanced | Severe pressure drops likely |
| Comfort | Even and steady | Hot spots, sticky air |
How the Coil, Line, and Liquid Refrigerant Move Heat
I’ve spent years chasing cooling problems in the field, and one pattern shows up again and again: the parts look fine on paper, but they were never meant to run together. To see why that matters, you need to know how heat actually moves. It all rides on the refrigerant and the two copper lines that carry it. Miss the sizing, and the whole loop struggles.
Cooling works in a circle. Cold, low-pressure gas leaves the indoor evaporator coil through the suction line – the bigger, insulated copper pipe. The compressor in the outdoor unit squeezes that gas, which heats it up fast. The heat dumps outside, and the refrigerant turns into a warm liquid. That warm liquid then travels back inside through the thin liquid line, usually about 3/8 inch across.
Then comes the key step. The liquid refrigerant hits a small metering device at the coil and expands fast. It gets very cold. Warm household air blows across the cold coil, gives up its heat, and your rooms cool down. The whole cycle needs the right amount of refrigerant moving at the right pressure through lines sized in exact inches. Get those numbers wrong, and the loop falls apart.
Here is the part most people miss. Every inch of pipe diameter is chosen on purpose. A 3/4-inch or 7/8-inch suction line is picked to match the coil’s job and the compressor’s pull. Pair the wrong coil, and the inch suction line you already have may be too small or too large for the new load. That one mismatch can drag the entire system down with it.
Why SEER2 Pairings Matter So Much for Efficiency
SEER2 is the newer way we measure how much cooling you get for the power you pay. Higher SEER2, lower bills. But here is the whole point: a SEER2 number belongs to a specific pair of parts, not to the condenser alone. The rating comes from testing one exact coil with one exact condenser. Change the pairing, and the number on the box no longer describes your system at all.
Why does this test-pair rule exist? Because two matched parts move refrigerant in perfect balance. The tested coil is sized for the tested condenser’s flow. When you break that pair, the balance breaks too. You can lose a big chunk of the efficiency you paid extra for. If you suspect your charge is off, learn the signs your system needs a refrigerant recharge before you blame the coil.
Federal Efficiency Standards You Can’t Ignore
The government sets federal efficiency standards that every new system must meet. These efficiency standards are stricter in hot regions. The Southeast region, which includes Virginia, asks for at least 14.3 SEER2 on most split-system air conditioners. Install a mismatched pair, and you can quietly fall below that legal minimum. You end up with a system that is neither legal nor efficient, and you may not find out until it fails.
What Happens When the Indoor Coil and Outdoor Unit Don’t Match
I’ve handled cases exactly like this before. A homeowner swaps one part to save a few hundred dollars, and three months later the compressor is straining, the coil is freezing, and the power bill has jumped. A bad match doesn’t fail loudly on day one. It bleeds you slowly, week after week, until something big finally breaks.
Severe Pressure Drops and Weak Thermal Exchange
When parts don’t match, refrigerant pressure goes wrong. A poor pairing can trigger severe pressure drops across the coil, and those pressure drops starve the system of proper flow. The result is weak thermal exchange efficiency – a simple term for how well the coil moves heat into or out of the air. Low exchange efficiency means lukewarm air, longer run times, and Richmond’s humid summer air that never fully leaves your rooms.
The Undersized Evaporator Coil Problem
Size matters more than brand here. An undersized evaporator coil cannot absorb all the heat the condenser is built to move. When the evaporator coil capacity is too small, refrigerant can flood back or freeze the coil into a block of ice. Say you pair a 3-ton condenser with a 2-ton indoor evaporator coil. That undersized evaporator coil capacity forces the compressor to fight itself. A struggling undersized evaporator is one of the fastest ways to kill a brand-new compressor.
If your coil keeps freezing or your rooms just won’t cool down, that’s worth a closer look. The team at Richmond Air can check whether a mismatch or a plain AC coil problem is the real cause. A short visit now can save a huge repair bill later.
Heat Pump Pairings Need Extra Care
A heat pump is an air conditioner that can run in reverse to warm your home in winter. That means the heat pump works hard all year, not just in summer. So a good match matters twice as much. The pump has to move heat both directions, and a mismatched coil can break both jobs at the same time. One weak link, two broken seasons.
With a heat pump, the indoor coil also has to handle defrost cycles and cold-weather loads. Pair it wrong, and you lose heating power on the coldest Richmond mornings, right when you need it most. A proper match keeps the refrigerant charge correct in both heating and cooling modes. If your heat pump struggles to keep up, professional heat pump repair can tell you fast whether the coil and outdoor unit are truly a set.
The Liquid Line and Suction Line Sizing Trap
In my professional experience, line sizing is where good installs quietly go wrong. The copper looks the same to most eyes. But the liquid line and suction line carry very different jobs. Their size in inches is chosen to match one exact coil-and-condenser pair, and swapping parts without checking is asking for trouble.
The suction line is the big insulated pipe. It carries cold gas back to the compressor. Most homes use a 3/4-inch or 7/8-inch suction line, and the right inch suction line depends on your system’s tonnage. Too small, and you choke the flow. Too big, and the oil won’t return to the compressor. Either way, the compressor suffers.
The liquid line is the thin one, often just 3/8 inch. It carries warm liquid refrigerant back to the coil. A wrong inch liquid line – say a 3/8-inch liquid line stretched over a long, tall run without proper sizing – adds pressure loss and cuts capacity. When you reuse old lines with a new mismatched coil, you stack one inch liquid error right on top of another.
Here’s a simple sizing reference I use as a starting point. Real jobs always need a full load calculation, but this shows how line size and airflow scale with system size.
| System Size | Typical Liquid Line | Typical Suction Line | Target Airflow |
|---|---|---|---|
| 2 ton (24,000 BTU) | 3/8 inch | 3/4 inch | ~800 CFM |
| 3 ton (36,000 BTU) | 3/8 inch | 7/8 inch | ~1,200 CFM |
| 4 ton (48,000 BTU) | 3/8 inch | 7/8 inch | ~1,600 CFM |
| 5 ton (60,000 BTU) | 3/8 inch | 1-1/8 inch | ~2,000 CFM |
CFM and Airflow: The Number Most People Forget
CFM means cubic feet per minute. In plain words, it is how much air your blower pushes across the coil each minute. It is the quiet hero of every cooling system. Get the CFM wrong, and even a perfectly matched coil and condenser will let you down. Airflow ties the whole match together.
The rule of thumb is about 400 CFM per ton of cooling. A 3-ton system wants roughly 1,200 CFM of airflow. If your blower can’t hit that number, the coil runs too cold and can freeze over. Push too much air, and the system can’t pull moisture from Richmond’s sticky summer air. Matching the coil to the condenser only works when the CFM matches too, so airflow testing belongs in every honest install.
How a Mismatch Voids Your Warranty and Affects Insurance
I’ve seen this pattern many times in my work. The system fails, the homeowner files a warranty claim, and the paperwork gets denied – because the parts were never certified together. A mismatch doesn’t just cost efficiency. It can cost you the safety net you paid good money to have. That sting hurts far more than the first repair.
Home Warranty Companies and Uncertified Pairings
Manufacturers only back what they tested. When you install parts they never certified as a set, they call them uncertified equipment pairings. Home warranty companies use their own label – non-compliant pairings – but the outcome is the same. The result is a mismatched hvac assembly that nobody will stand behind. Your expensive compressor claim gets stamped “denied,” and you cover the full cost yourself.
Insurance Claims and System Failure
Your insurance may also push back. If a system failure leads to water damage or a fire, and the report shows a mismatched install, the insurance company can argue the work wasn’t up to code. A denied claim after a major failure hurts far more than the money you tried to save up front. Certified parts and clean paperwork protect you when it matters most.
For any big install, choosing the right HVAC contractor is the step that keeps your warranty and insurance intact. According to the U.S. Department of Energy, the current SEER2 testing standard took effect on January 1, 2023, and it rates systems as matched pairs – never as single parts. That rule is exactly why a mixed-and-matched setup so often loses its coverage.
Step-by-Step: How to Avoid a Mismatched Setup in Richmond
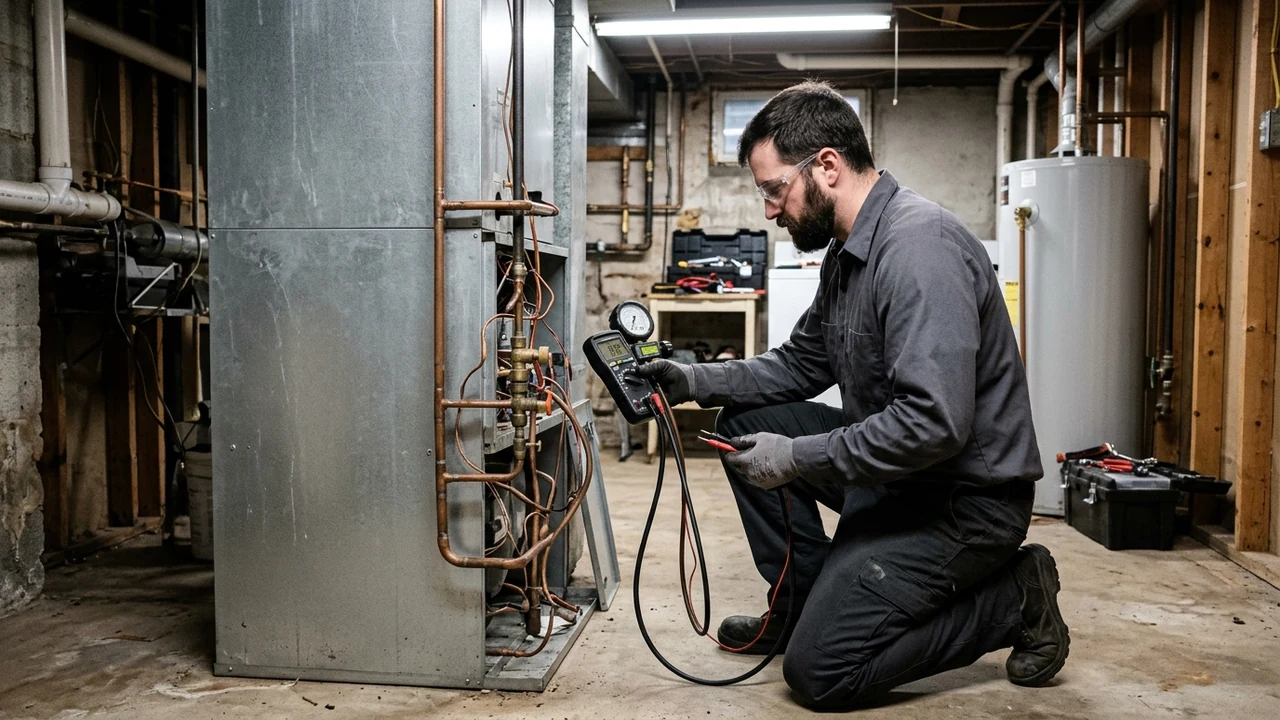
You don’t need to be a tech to protect yourself. You just need to ask the right questions and check the right numbers before anyone installs anything. Here is the path I walk clients through, step by step, so nothing slips past.
Phase 1: Audit and Preparation
Start by writing down what you already own. Note the model numbers on both the indoor coil and the outdoor condenser. Check the age of each part. If one is much older than the other, a proper match may mean replacing both at once. Then ask for a load calculation, a room-by-room math check that sets the right size and airflow for your home.
- Record model and serial numbers for the coil and condenser
- Note the age of each part and any past repairs
- Request a Manual J load calculation for correct ton sizing
- Ask what CFM the blower can actually deliver
- Check the current liquid line and suction line sizes in inches
Phase 2: Correct Pairing and Verification
Now you match. Ask your installer to confirm the coil and condenser share an AHRI-certified rating. That certificate proves the exact pairing was tested together, and it is the single best proof of a true match. Confirm the line sizes fit the new load. Check the refrigerant type too, since new 2025 systems use lower-impact refrigerants like R-454B, and mixing old parts with new ones is riskier than ever.
- Get the AHRI certificate number for your exact pairing
- Verify the liquid line and inch suction line match the new load
- Confirm one refrigerant type across the whole system
- Ask for the final SEER2 rating in writing
- Keep every document for your warranty and insurance file
Common Mistakes Richmond Homeowners Make
In my experience, the most expensive mistakes start small. One wrong part. One skipped calculation. Below are the traps I see most often around Richmond, and each one is easy to dodge once you know it’s sitting there. A little caution up front saves a lot of sweat in August.
- Replacing only the outdoor unit to save cash
- Trusting a low bid that skips the load calculation
- Reusing old, wrong-sized lines with a new coil
- Ignoring CFM and airflow during the quote
- Assuming a big-name brand can’t be mismatched
One mistake deserves its own warning. Reusing an old coil to save money almost never pays off. A shiny new condenser bolted to a tired, mismatched indoor coil brings back every problem you were trying to leave behind. When the math says replace both, it is usually time to weigh a repair against a full replacement with honest numbers in front of you.
Measuring Success: What a Properly Paired System Looks Like
A healthy, matched system is easy to spot once you know the signs. It cools evenly across every room. It runs in steady cycles, not short nervous bursts. Your power bill settles into a range you can predict. And the humidity in your Richmond home stays comfortable even during a muggy August week. When the pair is right, the whole house just feels calm.
ENERGY STAR, the government-backed efficiency program run through energystar.gov, notes that certified ratings only apply to matched systems. So if your parts match, the rating you paid for is the rating you actually get. If they don’t, that shiny number on the box was never really yours. Here are the everyday signs and numbers worth tracking at home.
| What to Track | Healthy Match | Warning Sign |
|---|---|---|
| Cooling cycles | Steady, 10-20 minutes | Short, frequent cycling |
| Indoor humidity | 45-55% | Sticky, over 60% |
| Temperature split | 16-22°F across the coil | Under 14°F |
| Monthly power bill | Steady and predictable | Climbing month to month |
Frequently Asked Questions
What is the $5000 rule for HVAC systems?
The $5000 rule is a quick way to decide between repair and replace. Multiply the age of the unit by the repair cost. If the answer is over $5,000, replace the system instead of fixing it. It is a rough guide, not a law, but it keeps you from pouring cash into a dying unit. Here it is in action.
| Unit Age | Repair Cost | Age × Cost | Smart Choice |
|---|---|---|---|
| 5 years | $400 | $2,000 | Repair |
| 8 years | $700 | $5,600 | Replace |
| 12 years | $500 | $6,000 | Replace |
Which heat pump brands should I avoid?
Honestly, I don’t tell people to fear one brand and chase another. Most major brands make solid units. The bigger risk is a bad install or a mismatched pair, which can wreck even a great heat pump. Look at the installer’s track record, the AHRI certificate, the warranty terms, and how easy parts are to get in your area. A well-matched mid-tier unit beats a top brand installed wrong every time.
What is a mismatched HVAC system?
A mismatched HVAC system is any setup where the indoor coil and outdoor condenser were not designed or certified to run together. The sizes, refrigerant flow, or efficiency class don’t line up. This causes severe pressure drops, higher bills, and warranty trouble. In short, it is two parts pretending to be one team when they never trained together.
When did SEER2 go into effect?
SEER2 went into effect on January 1, 2023. It replaced the older SEER test with a tougher one that measures systems under more realistic conditions, using higher static pressure to mimic real ductwork. That is why a SEER2 rating only holds true for a properly matched coil and condenser, tested as a single pair.
Can I replace just the outdoor condenser and keep my old indoor coil?
Usually, no – and it rarely ends well. Bolting a new condenser onto an older legacy evaporator coil creates a mismatched indoor coil that fights the new outdoor unit. That aging legacy evaporator can trigger severe pressure drops, poor cooling, and a voided warranty. In most cases, replacing both parts as a certified pair costs less over time than nursing a mismatch.
The Bottom Line for Richmond Homeowners
Mismatched evaporator and condenser coils are one of the sneakiest problems in home cooling. The parts look fine. The install looks done. But the efficiency you paid for quietly slips away, the compressor works too hard, and your warranty may already be void. In Richmond’s long, humid summers, that gap shows up as a hot, sticky house and a rising bill.
The fix is simple to say and worth doing right. Match the coil to the condenser. Confirm the AHRI certificate. Check the line sizes in inches and the CFM before anyone turns a wrench. Do that, and your system runs cooler, lasts longer, and keeps every bit of coverage you paid for.
If you’re not sure whether your indoor coil truly matches your outdoor unit, let’s take a look together. The team at Richmond Air can run a full check, confirm the pairing, and show you exactly where you stand – before a small mismatch turns into a big repair. Have you checked your own system’s match yet? It might be the most valuable ten minutes you spend on your home this summer.